How to set up your telescope


Acquiring your first telescope is such an exciting experience. I know that for a fact because I have been through it more than a decade ago. It is an investment that will allow you to explore the night sky in ways that you have never imagined possible. You may have already read the manufacturer's instructions on how to set up your new telescope. But let me give you a few practical tips on how to get the best out of your new instrument.
I'll walk you through everything you need to know about setting up your telescope, from choosing the right location to aligning your optics. By the time you're finished reading this article, you'll be ready to explore the night sky like never before!
Step 1: Choose the right location
The first step to setting up your telescope is to choose the right location. You want to find a spot where you will be able to see as much of the sky as possible. Ideally, you should set up your telescope in an open field away from any trees or buildings. If you are observing from your backyard, try to find a spot where you have access to a large open area.
You'll want to avoid observing directly above your neighbors' house, as some residual heat can radiate from their roof and slightly disturb your view of the sky. I would also recommend avoiding any areas that have been under the heat all day, such as concrete patios or asphalt driveways. The residual heat from these surfaces can radiate up into the sky and disturb your view.
The best time to set up your telescope is about an hour after sunset. This will give the ground a chance to cool down and the air above it to settle.
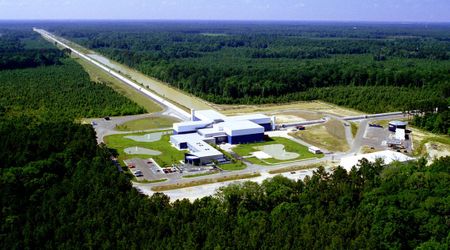
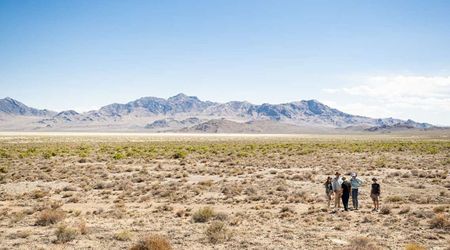
If you live in a light-polluted city, you may want to consider traveling to a dark sky site. These are locations where the night sky is relatively free of light pollution. Dark sky sites are the best places to observe faint astronomical objects such as nebulae and galaxies.

Heat radiating from nearby roofs can cause minor air turbulence.
Step 2: Set up your tripod
The next step is to set up your tripod. This is an important step because the stability of your telescope depends on it. Make sure that the legs are spread evenly and that the tripod is level. Once you start stargazing regularly, you'll quickly realise that a steady telescope means a steady view. After all, we are attempting to observe objects that are extremely far away! This means that the slightest movement of your telescope will result in a blurry image in the eyepiece.
I usually use a spirit level to ensure that the top of the tripod is perfectly horizontal. I then tighten the mounting screws and check the level again.
Note: If your telescope tube is mounted on an equatorial mount, you'll need to level the telescope with the counterweights that are attached to the balancing bar. This is to make sure the telescope tube does not collapse downwards.
Seasoned stargazers use tripod anti-vibration pads to increase the stability of their setup. You can find these easily online or at your local astronomy store. They reduce the amount of vibrations that are transferred from the ground to your tripod, resulting in a steadier view. It's especially useful when walking around the telescope.
If you're using a Dobsonian telescope, you won't need a tripod. These types of telescopes are designed to be used without one. Instead, they sit on a type of telescope mount known as "altitude-azimuth mount", which allows them to be moved freely up and down, right and left.
Polar alignment
If your telescope is mounted on an equatorial mount, you will need to align it with the celestial pole. This is important because it allows you to track astronomical objects as they move across the night sky.
If your mount is not equipped with a polarscope, you'll need to do a rough alignment by pointing the polar axis of the mount to this north. Then loosen the nut at the base of the tripod to set your observing latitude. To find out your latitude, click here.
If your mount is equipped with a polarscope, you may want to use it for a more precise alignment. This is especially important if you want to do long-exposure astrophotography. Find Polaris quickly by using an astronomy app on your phone, then use the adjustment knobs to match the markings on the polarscope. When Polaris is matching the nearby constellations, you're good to go!
If you live in the southern hemisphere, follow this handy guide to polar align your telescope without using Polaris.
Step 3: Set up your telescope (depending on its type)
There are three main types of telescopes: refractors, reflectors, and catadioptrics. The type of telescope you have will determine how you set it up.
Refracting telescopes
They are the simplest type of telescope to set up and use. All you need to do is balance your tripod, insert the eyepiece into the focuser and you're ready to go! No other setup is required.
Reflecting telescopes
Reflecting telescopes requires their mirrors to be perfectly aligned in order to make the most of them. A slight misalignment can cause a loss of photons which means that the view through your eyepiece will be dimmer. The act of aligning the primary mirror with the secondary mirror is called "collimation".
To make this process easier, I would recommend using a collimation tool. These are inexpensive and can be found easily online or at your local astronomy store. They are often in the form of a laser that is used the bounce a ray of light through the telescope. This will show you whether or not the mirrors are properly aligned. Then using the collimation screws on the back of the telescope, you can make the necessary adjustments.
Catadioptric telescopes
These types of telescopes use a combination of mirrors and lenses to form an image. The most popular type is the Schmidt-Cassegrain telescope (SCT). They also require regular collimation to function to the best of their abilities.

Refracting telescopes are the easiest and quickest telescopes to set up.
Step 4: align your finderscope or red dot finder
The next step is to align your finderscope or red dot finder. This is a small telescope that is mounted on the side of the main telescope. There are two main types of finderscopes: optical and red dot. Optical finderscopes use a crosshair reticle to help you line up your target object. Red dot finders use a red LED to project a dot onto the sky. They offer a wider field of view, giving you a larger area to search for your target object.
Most finderscopes will need to be aligned with the main telescope before use. This process is relatively simple and only takes a few minutes to do. I recommend doing this step during the daytime. Select a distant object such as a tree or a lampost and point the main telescope at it. Then, adjust the finderscope until the object is in the crosshairs (or centred in the red dot) using the adjustment screws. Once you have done this, your finder will be properly aligned with the main telescope.
Step 5: Thermal Acclimation
Whether you are using a reflector, refractor, or catadioptric telescope, there is one important thing to remember: your optics need to be thermally acclimated. This simply means that you need to let your telescope sit outside for at least 30 minutes before starting your observing session.
This may seem like a silly step, but it's actually quite an important one. Indeed, the temperature inside your telescope's optical assembly tube can be quite different from the temperature outside. This can cause a current of warm air current to go through your telescope tube, a convention effect which happens when the warm air inside your telescope expands and collides with the cooler air outside. This can cause your view to be shaky or distorted.
Allowing your telescope to sit outside for a while will help it reach thermal equilibrium with its surroundings. This will minimize the amount of tube air current, and the metallic parts as well as the mirrors or lenses to be thermally stable too, providing you with the sharpest possible views.

Step 6: Select the right eyepiece
The next step is to select the right eyepiece. Eyepieces are a pivotal part of the telescope, as they are responsible for magnifying and focusing the images that you see in the eyepiece. There are a wide variety of eyepieces available on the market, but each serves a different purpose. For instance, some eyepieces are designed for observing planets while others are better suited for deep-sky objects.
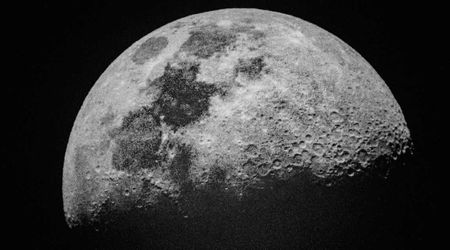
Selecting the right eyepiece depends on what you want to observe. If you're interested in observing planets or the Moon, try using a high-power eyepiece (with a shorter focal length, about 2 to 10mm). They'll give you a high magnification and a narrow field of view, which is perfect for zooming in on the Moon's crater, Jupiter's red spot or Saturn's rings.
On the other hand, if you're interested in deep-sky objects such as nebulae and galaxies, you'll want to use a low-power eyepiece (with a longer focal length, about 13 to 35 mm). They provide a wider field of view, which is necessary when observing larger celestial objects.
Once you've selected the right eyepiece, it's time to install it in your telescope. This is a simple process: just unscrew the dust cap from the telescope's eyepiece holder and screw in the eyepiece. Make sure that it's screwed in tightly so that it doesn't come loose during your observing session. Be sure to experiment with those, becoming a good stargazer is mainly about understanding how light works and how to use the tools at your disposal to make the most out of the photons that enter your telescope's aperture.
Bonus step: Use telescope filters
One final step that I recommend, especially if you're observing planets, is to use telescope filters. These devices attach to the eyepiece and help enhance the contrast of certain planetary features. There are a wide variety of filters available on the market, each designed for a specific purpose.
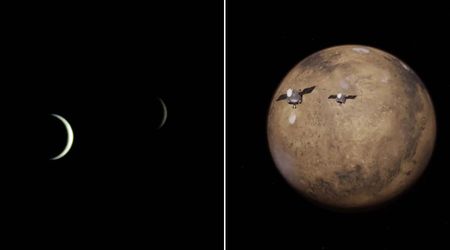
For instance, the red filter will help you see the Martian polar caps or the blue filter will make Jupiter's cloud belts more visible. There are special filters specifically designed for observing the Moon. They can definitely enhance your experience and are definitely worth considering if you're serious about stargazing as a hobby.
Final step: Enjoy the view!
That's it! You're now ready to start stargazing. Just remember to be patient and take your time. It may take a while to get used to using your telescope, but the effort is well worth it. After all, there's nothing quite like experiencing the wonders of the night sky with your own eyes. Better yet, you can now share that experience with your family and loved ones.
So get out there and start exploring the universe!
Clear skies!